|
How to Use Filters in Photography
A photographic filter is an attachment that will allow certain kinds of light to be able to pass through, and able to reduce or block out other unwanted light sources. In short, the term really means anything that modifies the incoming light in some way and includes: polarizing screens, multi-image prisms, close-up attachments, soft focus, neutral density (ND), graduated ND and colour ones for black and white photography. They work by being placed in front of your camera lens. You can also place several in front of your camera at any given time. Let’s take a look at the most important ones to use. 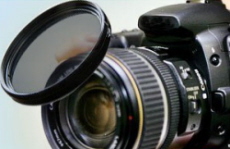
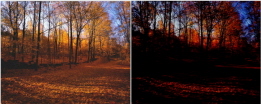
Neutral Density (ND): Neutral Density filters will certainly help you with tough exposures. These work by cutting down the light that reaches your lens. They come in a variety of strengths with the most popular being 0.3, 0.6 and 0.9 - they will help with exposure without affecting colour. One half of this type is dark and the other is completely clear. They basically work by reducing brightness. The different numbers stand for the amount of brightness they reduce - 0.3 ND reduces light by one stop - 0.6 reduces light by 2 stops - 0.9 reduces light by three stops. Lets say you arrive at a high contrast scene, - you take a light reading of the sky and get an exposure reading of F/22 at 1/8 second; you take a reading from the ground in front of you and get a reading of F/22 at 1 second. This is a difference of three stops of light. You need to reduce the brightness of the sky. By using the 0.9 ND you will reduce the light in the sky by three stops without affecting the light hitting the ground in front of you.
Warm-up: In overcast conditions, don’t put your camera away. This is an ideal time for you to switch your attention to landscape detail. On an overcast day images often appear cold and dull. Try using a warm-up type. This will remove the dull effect that you get shooting without the sun. The 81-series are the best choice and will give your images an extra bit of life. An 81A warm-up filter is ideal to use in adding extra warmth to low light images.
The red filter is one of the most popular. This will darken the sky giving your image more impact. The most common one is the number 25. Filters for B/W work by transmitting light of its own colour, and holds back light of the other colours. Colour filters: They add colour and a certain touch to a photo that complements the individuals style of photo taking. When you are using a black and white film, you can darken or lighten the tone of the subjects colour. The colour ones that are used can darken the tone of an opposite colour and brighten the tone of the colour filter that is being used.
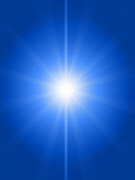
The star type. This type used in photography is placed on the cameras lenses to create a star look effect from any source of light.
An infra red type will block visible light and only allow infrared light to pass through to the camera lens. The part of the spectrum that infrared uses is referred to as near infrared, this is different from far infrared, which is used in thermal imaging. Infrared ones will turn the sky very dark, greens can appear almost white.
UV types are used to reduce haziness created by ultraviolet light. It is mostly transparent to visible light, and can be left on the lens for nearly all shots. A strong UV one cuts off some visible light in the violet part of the spectrum, and so has a pale yellow color. Strong UV types are also sometimes used for warming color photos taken in shade with daylight-type film.
Return to Photography
|


 Using Filters to Enhance your Photographs.
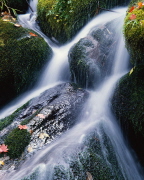 Polarizing: This one should be top of the list - this can be used with colour or black and white and is probably the most important type on the market today. The polarizing type will also darken the blue sky to give it a strong rich colour. It will make mist stand out and can be also used to give fast flowing water a misty effect. This type is most effective with side lighting.
 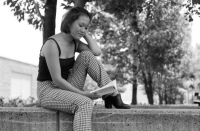 B/W photography: Just because you use black and white film it doesn’t mean that you can’t use filters - there are several types for B/W photography. The polarizing filter is one of the few that work for B/W and colour photography. It will help to darken shades of grey in your final print.
 This is very popular with television game shows and used for portraits to provide a soft overall diffusion.
